
Winter in the Adirondacks is truly magical. With rocks and roots buried in snow, vicious flies and mosquitoes a distant memory, and the thick, humid air of summer replaced with a crisp chill, there are countless benefits to exploring the Adirondacks in winter. When it comes to photography, no other time of year allows for such dramatic and otherworldly photos to be created. From forested foothills to the exposed alpine zone above tree line, the landscape takes on a special character that beckons to be photographed. If you’re going to make the most of winter photography in the Adirondacks, there are certain techniques and equipment required for a safe and successful experience, not to mention three geographic zones that make for especially stunning winter photography.

Gear & Equipment
Before heading out to explore and photograph the winter wilderness, gearing up with the proper photography equipment is imperative to achieving the best possible results. There are a plethora of options available when it comes to cameras, with digital single-lens reflex (DSLR) and mirrorless cameras currently the two most predominant types. Choosing a camera can be a daunting and often confusing task when starting out in photography, and it’s easy to get bogged down in the nitty gritty details. While it’s possible to take excellent photographs with a wide array of cameras, there are certain attributes that facilitate the creation of high-quality images. These include being able to shoot in Manual mode to have full control over aperture, exposure time, and ISO (sensitivity to light), which allows the photographer to modulate each setting for creative purposes. Cameras with removable lenses are also ideal as it allows the use of a particular lens for a certain purpose. A wide-angle lens of 16-35mm, for example, is perfect for expansive landscapes, but won’t be able to zoom in and provide a detailed shot of a snowy mountaintop in the distance. A telephoto lens (200-400mm, for example), on the other hand, is perfect for frame-filling shots of mountain ridges or an owl perched on a snowy tree branch. On the opposite end of the spectrum, a macro lens is specifically designed for close-up and intimate views where the lens is placed mere inches from a subject such as intricate icicles or the snow-covered tips of a tree branch.
Aside from a camera and lenses, the most important piece of photography gear for making beautiful winter images is a tripod. A tripod is a necessity in low light conditions such as dusk and dawn when a longer exposure time is required and hand-holding the camera would result in a blurry image. Splurging on a carbon fiber tripod is one of the best equipment investments that can be made, as carbon fiber provides an optimal balance of being lightweight yet sturdy. Topping the tripod with a ball head that can freely rotate and that the camera will be attached to allows the camera to be firmly locked in place once the desired composition has been framed.
A number of accessories are worth the space in your camera bag, with possibly none being more useful than a circular polarizer filter. A circular polarizer cuts glare and helps to bring out the color and saturation of reflective surfaces such as water, and also deepens the color of a blue sky. The effect that a circular polarizer has is dependent on the angle of the light source to the reflective surface, and can be tuned to the desired level by turning the circular polarizer.
Neutral density filters are another type of filter that can yield interesting results. These filters come in varying degrees of darkness that prevent a certain amount of light from reaching the camera sensor, thus requiring a longer exposure time to be used. Neutral density filters are particularly useful in situations where a long exposure is desired but it’s too bright out to use a long exposure time without overexposing the photo. These filters are great for turning nearly imperceptible motion, such as foam bubbles or fallen leaves on the water’s surface slowly turning in an eddy, or clouds gradually drifting through the sky, into fascinating swirls and streaks that are revealed over the course of a multi-second exposure.
A remote shutter release is another useful and relatively inexpensive accessory. These come in varying levels of functionality, but all serve the same general purpose, which is to trip the shutter and take a photo by pressing the remote shutter release instead of pressing the shutter on the camera. This helps to create the sharpest image possible by eliminating vibration that could be introduced by pressing the shutter button on the camera. Spare batteries in winter are also critical, as frigid temperatures sap battery life, and a microfiber cloth also comes in handy for wiping water droplets and dew off of the lens front without scratching the lens.
Proper clothing and hiking gear plays as critical a role as photography equipment when it comes to winter photography, and is essential not only for safe and efficient travel, but also to make the photographic experience as enjoyable as possible. While a deep-dive into this topic is beyond the scope of this article, one of the most important pieces of non-photographic gear that has the biggest impact on winter shooting is hand protection. Finding the optimal balance between warmth and dexterity can be tricky, but a pair of lightweight gloves with grip on the fingertips provides enough dexterity to adjust camera settings while typically providing sufficient warmth in calm conditions. In truly frigid or excessively windy conditions, throwing a pair of mittens over the gloves allows the hands to warm up before going down to just gloves again when camera adjustments are necessary.
The Alpine Zone
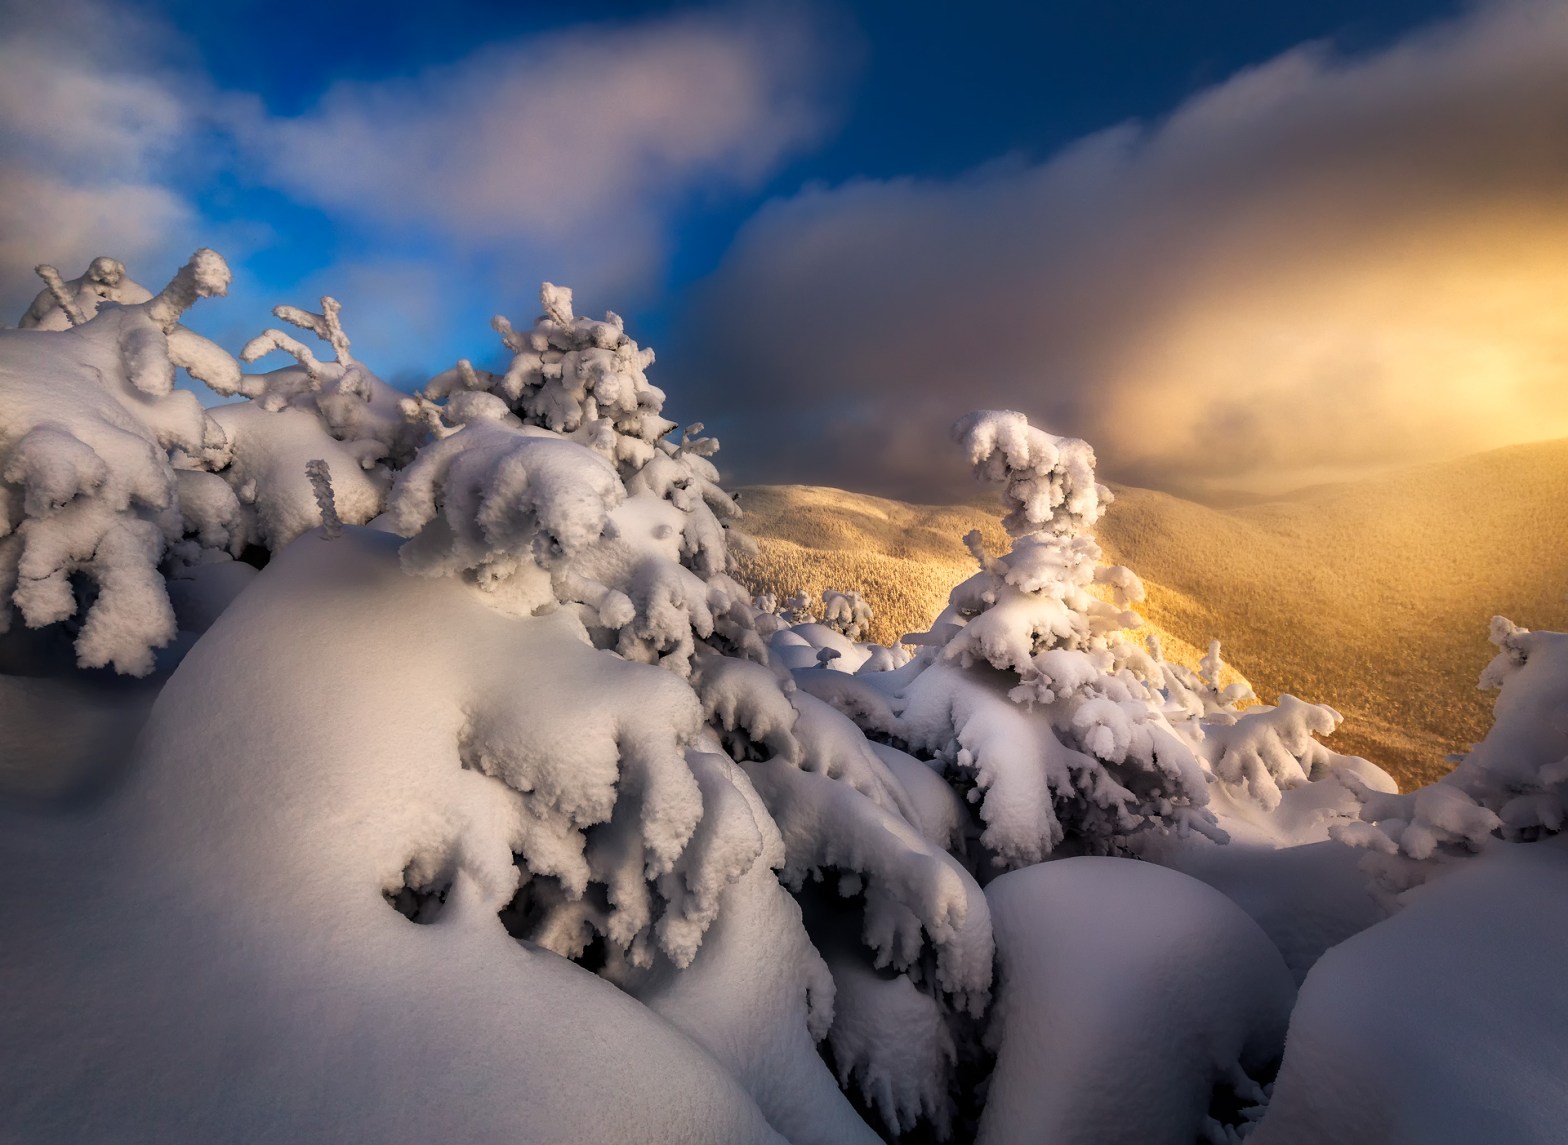
Once you’re geared up with the proper photography and hiking equipment, it’s time to head out to the winter wilderness. The alpine zone above tree line in the High Peaks is one of the most fascinating destinations for winter shoots in the Adirondacks. Even when the foothills have just a dusting of snow, this zone is often a veritable winter wonderland. With ever-changing and oftentimes savage weather, you never know exactly what conditions you’ll be greeted with, no matter how many times you’ve climbed a given peak. This can make it challenging to plan ahead and visualize the kind of photographs that you’d like to make, but it also presents a great opportunity for making incredible images.
Given the exposed nature of the alpine zone, where shelter from the elements is practically nonexistent and snowdrifts can often obscure navigational markers, above tree line is not the place to be during inclement weather. After a storm has passed, however, can be one of the best times for capturing images in these areas that are covered in freshly fallen snow with dramatic, clearing skies overhead.
Depending on the size of the storm, access above tree line can be more challenging and dangerous than usual, as trudging through a couple feet of powder, even with snowshoes on, requires significantly more effort than trekking on hard-packed snow. While rare in these mountains, avalanche danger is also heightened after a heavy fall of snow. The alpine zone is also an excellent destination to photograph early and late in the season, when the conditions at lower elevations are suboptimal. A climb that begins on a trail barely covered in snow can lead to areas that still resemble peak winter conditions.

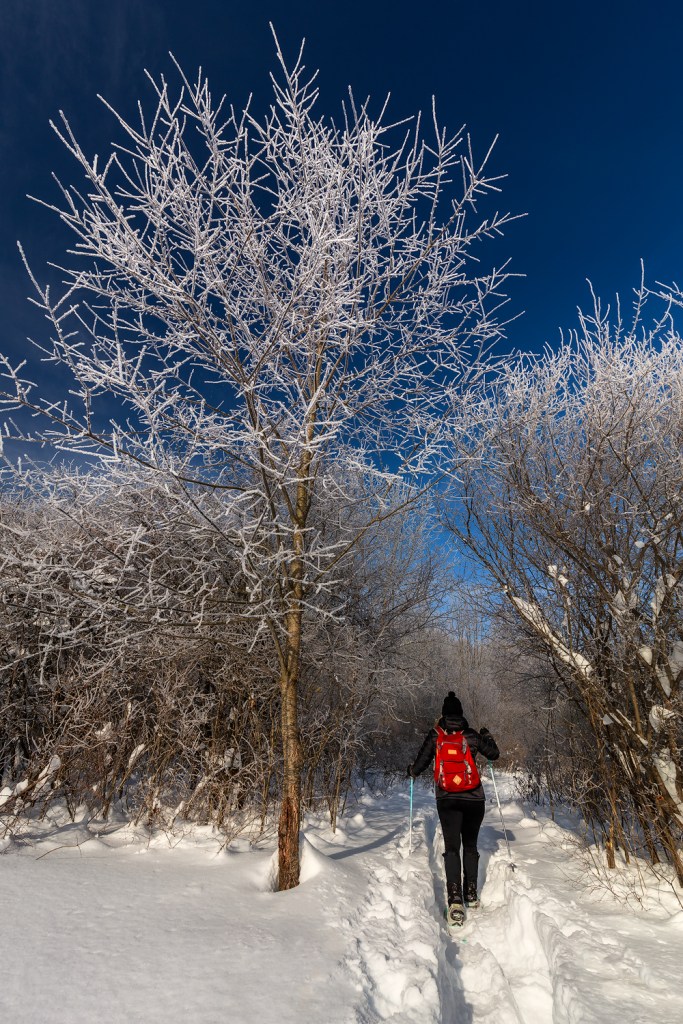
The expansive nature of the alpine zone is perfect for wide-angle landscape photography. Fierce winds that rake the high summits carve snowdrifts into fanciful shapes that create interest in the foreground, and leading lines that draw the eye into the photo. The crisp winter air produces the deepest blue sky imaginable, which contrasts nicely against puffy white clouds and the snowy landscape—utilizing a circular polarizer to reduce glare can make this contrast pop even more. While clear skies make for beautiful, sunny hiking weather they present a challenge to the photographer. Featureless skies can make an otherwise intriguing composition boring and uninteresting. This can be combatted by having hikers or trees silhouetted on the horizon or by using a small aperture to create a sunburst that adds drama and intrigue to an otherwise featureless sky.
Frozen Waterfalls
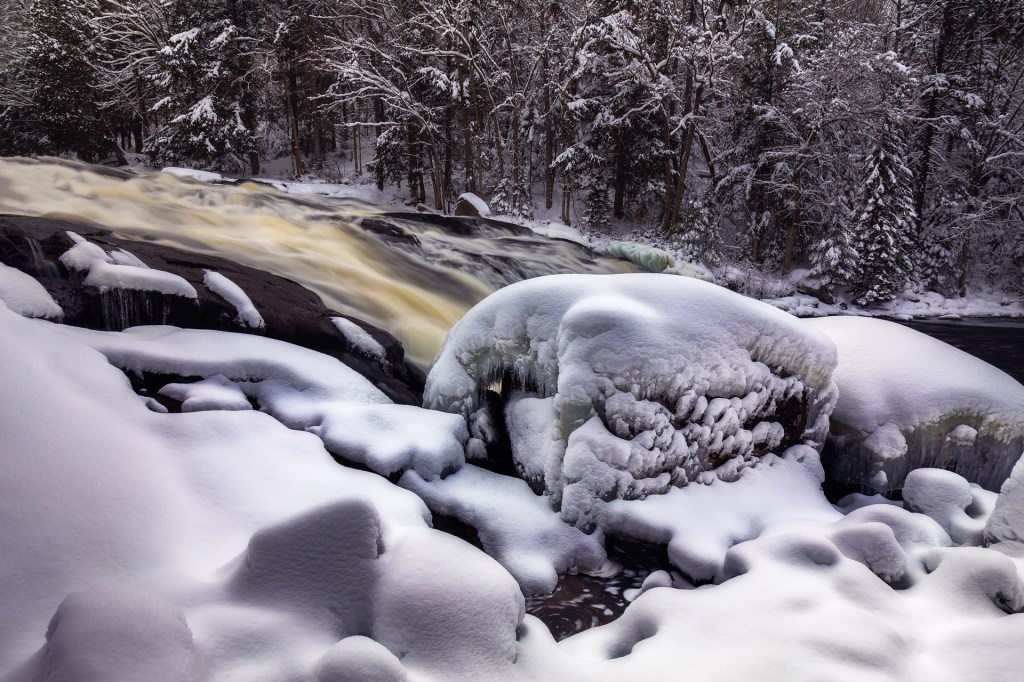
The sound and sight of water cascading through a pristine forest is one of nature’s greatest gifts. While waterfalls are beautiful photographic subjects any time of year, when the temperature drops and the falling waters of summer and autumn slowly solidify, they take on a surreal and otherworldly magnificence. The Adirondack Mountains are blessed with a bounty of waterfalls, big and small, easily accessible and off the beaten path, providing countless opportunities for photographing the haunting beauty of water frozen in time.
Early in the winter season, when intricate ice details begin to take shape, yet water is still flowing, offers optimal conditions for making dynamic photos. A favorite technique when photographing waterfalls is to utilize a long exposure, anywhere from ¼ of a second to multiple seconds, depending on the water’s flow rate and the desired effect. This technique gives the moving water a silky smooth appearance.

A circular polarizer not only helps to reduce glare off of rocks and ice, but also helps to increase exposure time by decreasing the amount of light that reaches the camera sensor. Neutral density filters can also be used if an even longer exposure time is desired. A tripod is essential for these long exposures in order to achieve a sharp image, and to take multiple exposures to blend in post-processing if the dynamic range of the scene is too broad to cover in a single exposure, as often is the case when bright white snow and water, as well as dark rocks or trees, are all found in the same composition.
An unlikely piece of gear that can come in handy when photographing waterfalls is a small travel umbrella. Depending on the size of the waterfall and how close the camera is placed to the moving water, spray from the waterfall can be nuisance, and can ruin a photo-shoot if it unknowingly accumulates on the front of the lens. Spray is especially a concern when using a wide-angle lens and getting close to moving water to emphasize water action as a foreground element. After settling on a composition, if spray has accumulated on the lens front, a microfiber cloth can be used to wipe the water droplets away with one hand while shielding the camera with the umbrella, thereby preventing more spray from accumulating. The umbrella can then be lifted right before tripping the shutter to ensure that the shot gets off before water droplets accumulate on the lens again.
Forests and Intimate Details
The deep forests that comprise much of the six million acres of the Adirondack Park hold many hidden scenes just waiting to be discovered by the patient photographer. Whether en route to a high summit or on a relaxed Sunday morning snowshoe through the woods, pay close attention to your surroundings and you’ll discover intricate details that often go unnoticed. The small creek that gets stepped over in the summer without a thought is transformed into an abstract world full of bizarre forms when it freezes. Evergreens that typically blend into the background become coated with rime ice and morph into something straight from a Dr. Seuss book. Shadows cast on the snowy forest floor by the low-angled winter sun take on ghostly shapes.
The winter forest, while serene, can also be a chaotic and difficult subject to successfully photograph. A fresh blanket of snow can help to simplify things by covering up the jumbled forest undergrowth, but extra care still needs to be taken to ensure that not too much is crammed into the same image. Experimenting with a telephoto lens to isolate smaller sections of the forest is a great way to clarify the winter forest, and these lenses are especially useful for turning the mundane into an abstract work of art, especially when the image is converted to black and white. Using a telephoto lens to create a frame-filling shot of snow-covered tree branches, for example, can yield an image that’s a study of lines, shapes, and textures, and presents the winter forest in a unique and intriguing way.

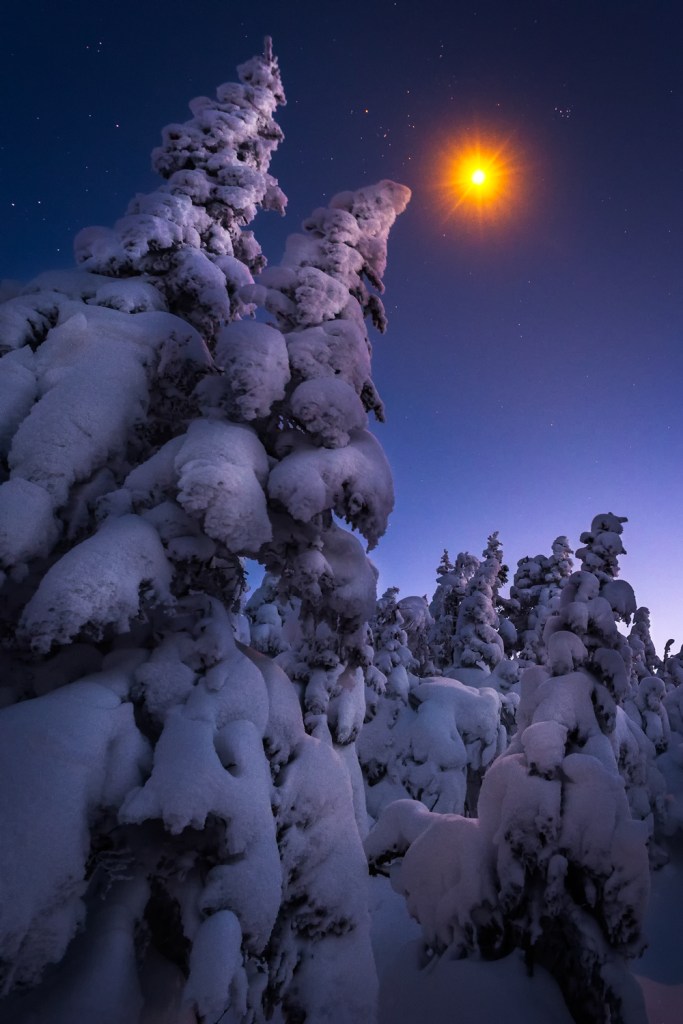
One of the most fascinating aspects about mountain climbing is how the geography changes with elevation, and this is especially apparent when it comes to trees. The towering hardwoods that stretch to the sky in the foothills give way to hardy evergreens as elevation increases, which shrink in size and take on fanciful shapes as the alpine zone is neared due to the constant battering by wind. The upper reaches of the forest, where the tree cover thins out and the sky is more readily viewed, presents unique photography opportunities. Evergreens caked with rime ice and fresh ice are the epitome of an Adirondack winter, and stand like frozen sentinels keeping watch over the mountains. The eerie glow that permeates at dusk can be the perfect complement to the bizarre shapes that these trees often take on, and a clear night and starry sky also lends itself to creating truly unique images.
Exploring and photographing the Adirondacks in winter presents numerous challenges, but even more rewards. Braving hostile conditions and coming away with awe-inspiring photographs of your journey will stir up feelings of accomplishment and ecstasy so potent that you’ll be itching to get back into the frozen winter wilderness as soon as the car ride home begins. With the proper hiking and photography gear in your pack, and creative vision in your mind, the haunting beauty of winter will be revealed and make you wish that spring would never come.
Opening Image: “Higher and Higher” – Beautiful sunset light makes the snowy winter landscape come alive. The solitude and dramatic beauty of winter makes it my favorite time of year to explore the mountains. Prints available.
Note: A version of this article appeared in the Winter 2019 issue of Local ADK magazine.
