
The sound and sight of water cascading down through a pristine forest is one of nature’s greatest gifts, and whether surrounded by lush spring foliage or the ice and snow of winter, waterfalls make for intriguing photography subjects. Coming away with unique and impactful photos can be a challenge, however, and this article will dive into several useful tips to help take your waterfall photographs to the next level.
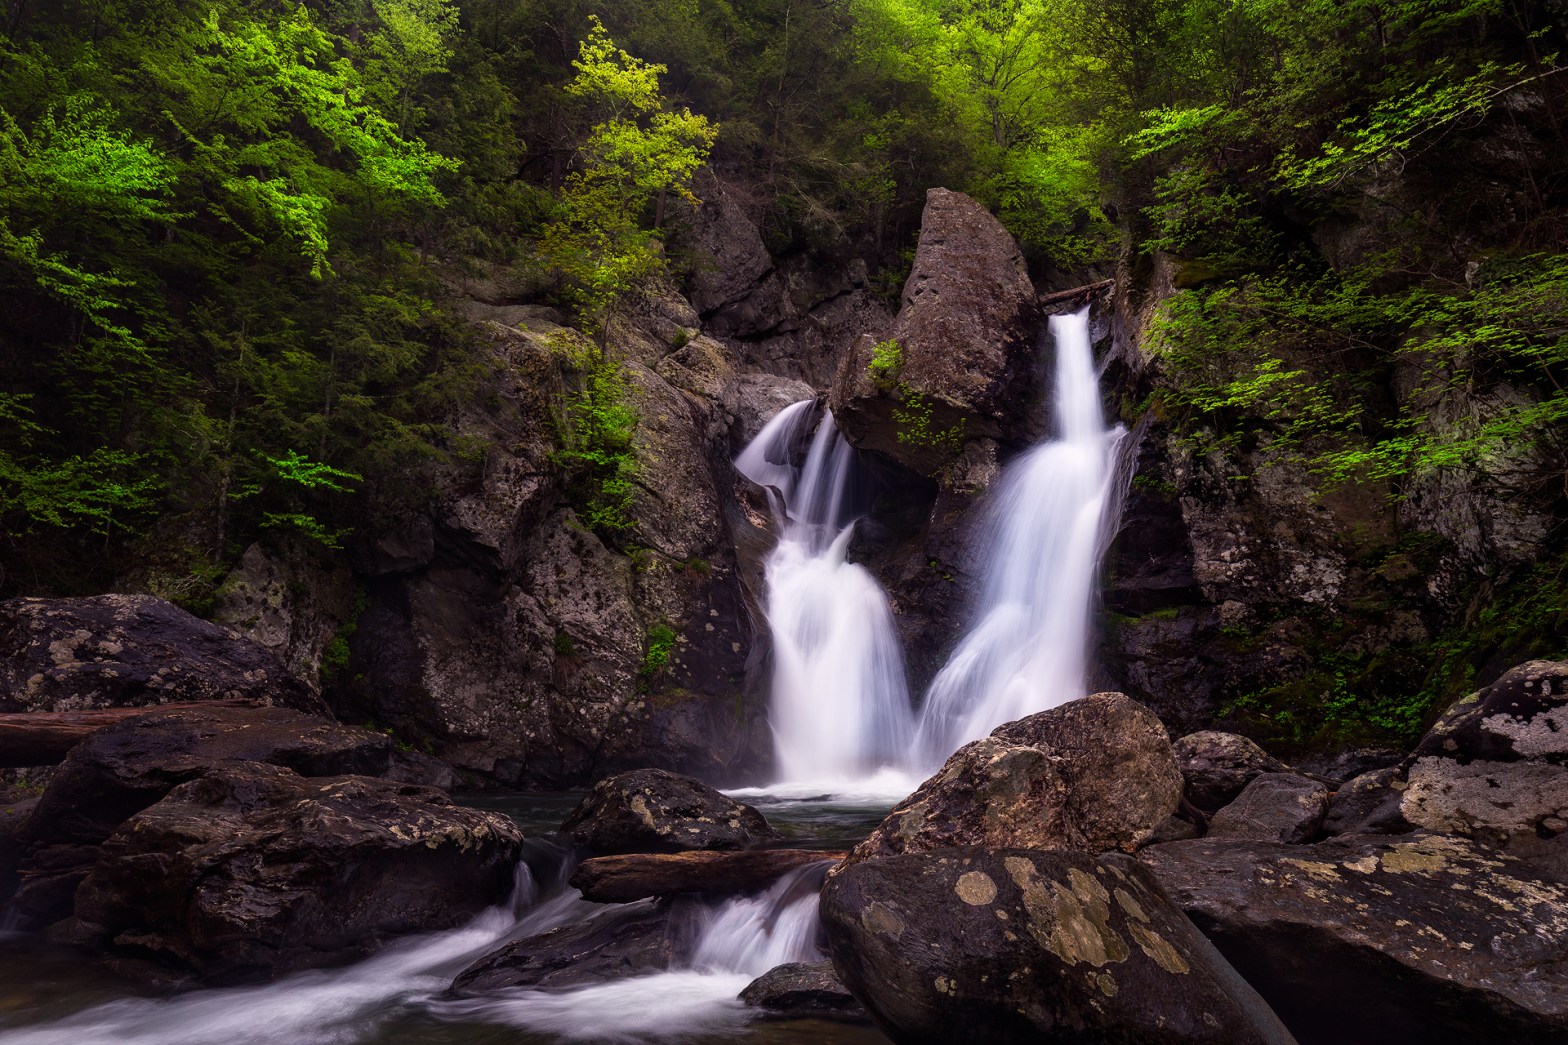
1. Use a Tripod
Using a tripod facilitates a technique that produces some of the most eye-catching and soothing waterfall photographs, which is utilizing a long exposure, anywhere from ¼ to multiple seconds depending on the water flow rate and the desired effect, to give the moving water a silky smooth and dreamy appearance. A tripod is essential for these longer exposures in order to achieve a sharp, in-focus image, and to possibly take multiple exposures to later blend in post-processing if the dynamic range of the scene is too broad to cover in a single exposure, as often is the case when bright white snow and water as well as dark rocks or trees are all found in the same composition.
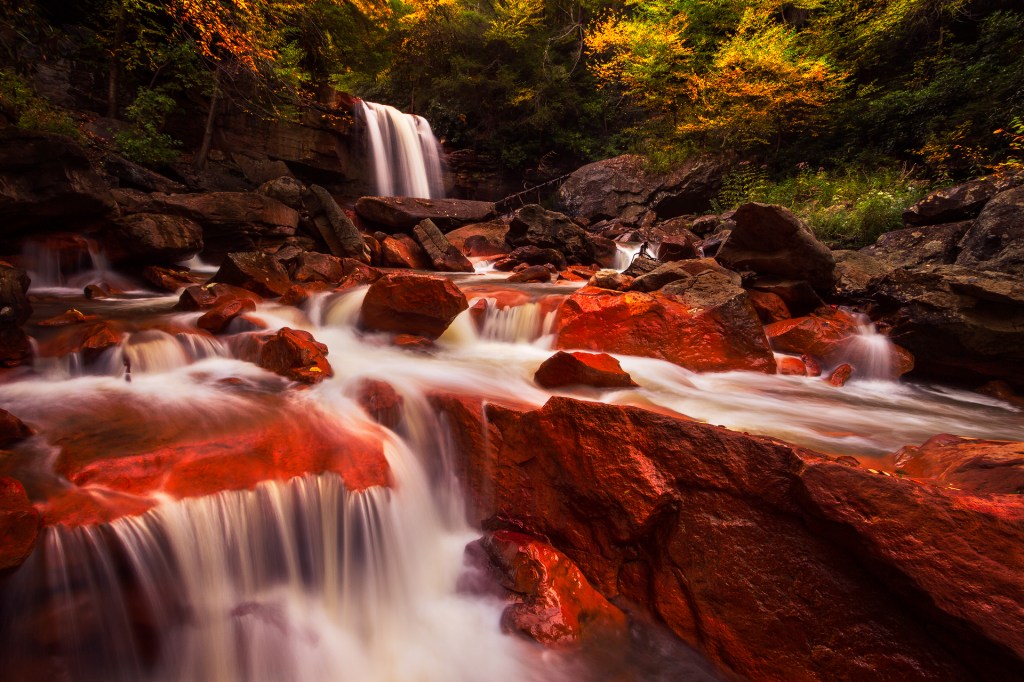
2. Use a Circular Polarizer
A circular polarizer is another critical piece of equipment when photographing waterfalls to give your photographs some extra pop. Just like the polarized sunglasses that you might wear while fishing or kayaking, a circular polarizer reduces glare. Cutting glare helps to bring out the color and saturation of reflective surfaces such as wet autumn foliage and colorful rocks, and also deepens the color of a blue sky. The effect that a circular polarizer has is dependent on the angle of the light source to the reflective surface, and can be tuned to the desired level by turning the circular polarizer.

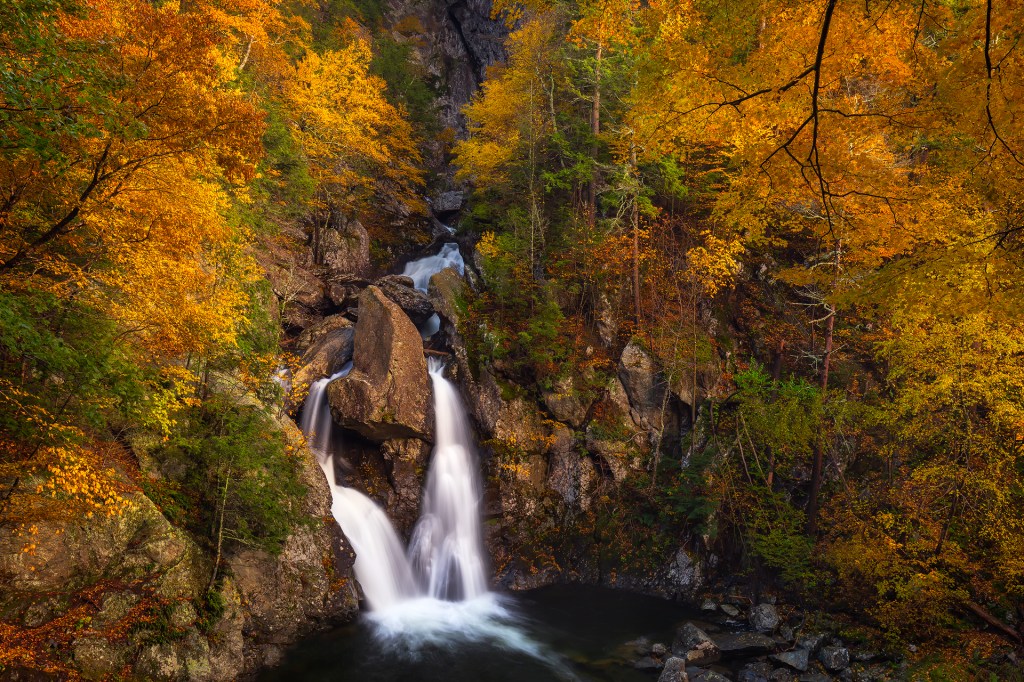
3. Overcast days are Optimal
Cloudy days, especially after a fresh rain, are optimal for photographing waterfalls and provide a great alternative to hiking a mountain when the weather is subpar on exposed summits. The soft, even lighting on cloudy days allows for photos to be taken all day long, and the decreased amount of light as compared to a bright sunny day lends itself well to using longer exposures.
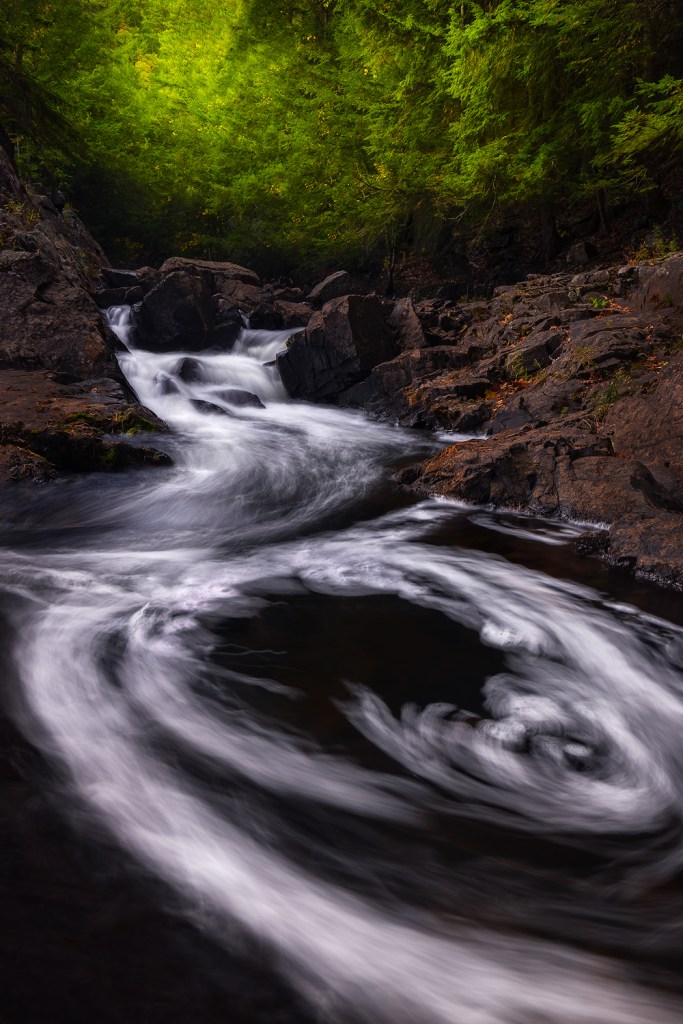
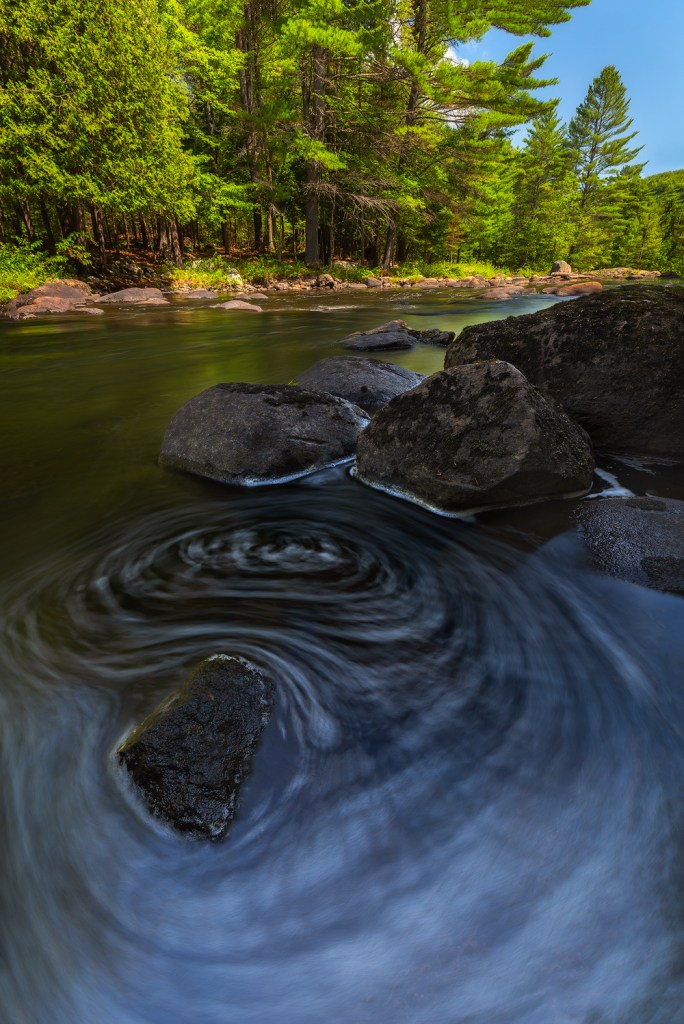
4. Know When to Use a Neutral Density Filter
Neutral density filters are filters that come in varying degrees of darkness that prevent a certain amount of light from reaching the camera sensor, thus requiring a longer exposure to be used. These filters are particularly useful in situations where a long exposure is desired but it’s too bright out to use the desired exposure time without overexposing the photo. These filters are great for turning nearly imperceptible motion, such as foam bubbles slowly turning in a river bend, into fascinating swirls that are revealed over the course of a multi-second exposure.
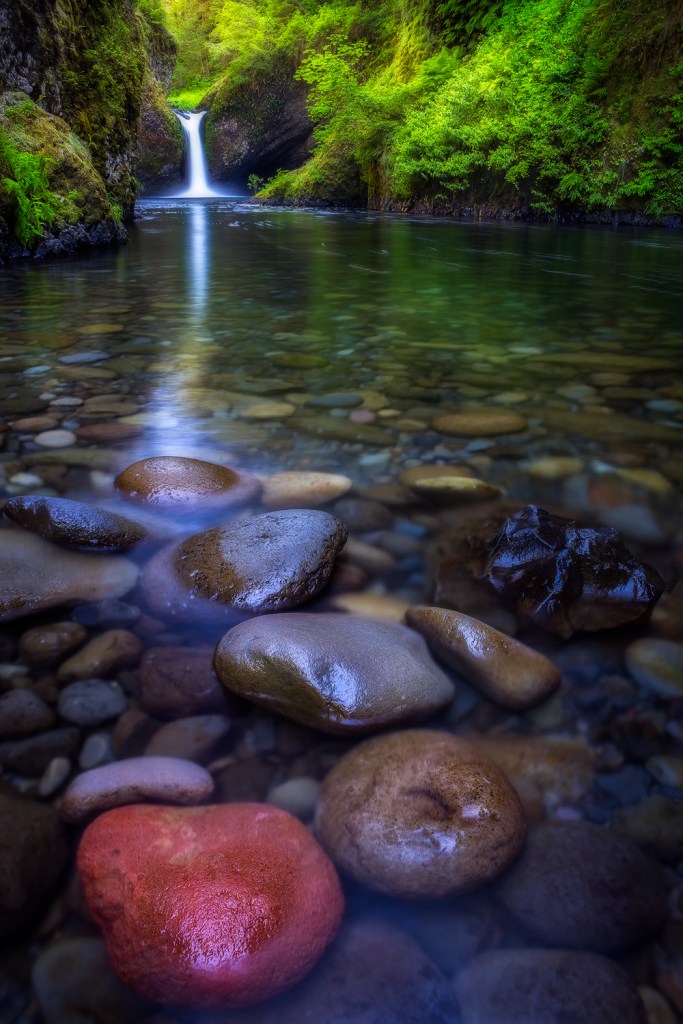
5. Get Wet
One of the best ways to create dynamic photographs of waterfalls is to get right in the water, especially when using a wide-angle lens. This results in images that really draw the viewer into the photo, especially when the camera is placed close to a compelling foreground subject, such as rapids cascading over smooth rocks or rivulets acting as leading lines towards a waterfall in the background. Having an old pair of hiking boots or running shoes to wear into the water can be useful to provide better traction on slippery rocks and to protect your feet, and in colder water a pair of neoprene socks or even full-blown waders can help to keep you warm, comfortable, and focused on photography and not on how numb your feet are. It’s important to note, however, that common sense has to be used when deciding whether or not to get in the water (more on that in Tip 7), and while a shallow creek typically poses little danger, wading into a raging river swollen with spring snow-melt, for example, poses a significant risk.
6. Utilize an Unlikely Accessory
An unlikely piece of gear that can come in handy when photographing waterfalls is a small travel umbrella. Depending on the size of the waterfall and how close the camera is placed to the moving water, spray from the waterfall can be nuisance, and can outright ruin a photo-shoot if it unknowingly accumulates on the front of the lens. Spray is especially a concern when using a wide-angle lens and getting close to moving water to emphasize water action as a foreground element, as described in Tip 5. After settling on a composition, if spray has accumulated on the lens front, a microfiber cloth can be used to wipe the water droplets away with one hand while shielding the camera with the umbrella, thereby preventing more spray from accumulating. The umbrella can then be lifted right before tripping the shutter (with a remote shutter release to minimize camera vibration caused by pressing the shutter button on the camera body) to ensure that the shot gets off before water droplets accumulate on the lens again.
7. Resist “Photo Fever”
Just as the mountaineer can get “summit fever” and ignore dangerous warning signs on the push to a summit, it’s easy for the photographer to get caught up in “photo fever” in the pursuit of a desired photograph. We’ve all thought to ourselves at one point or another “if I can just get a little closer, this photo will be perfect” while chasing a photograph, but it’s important to consider the potential risk associated with any action, especially when getting “just a little closer” could mean slipping on mossy rocks and getting swept away by a raging torrent of water.
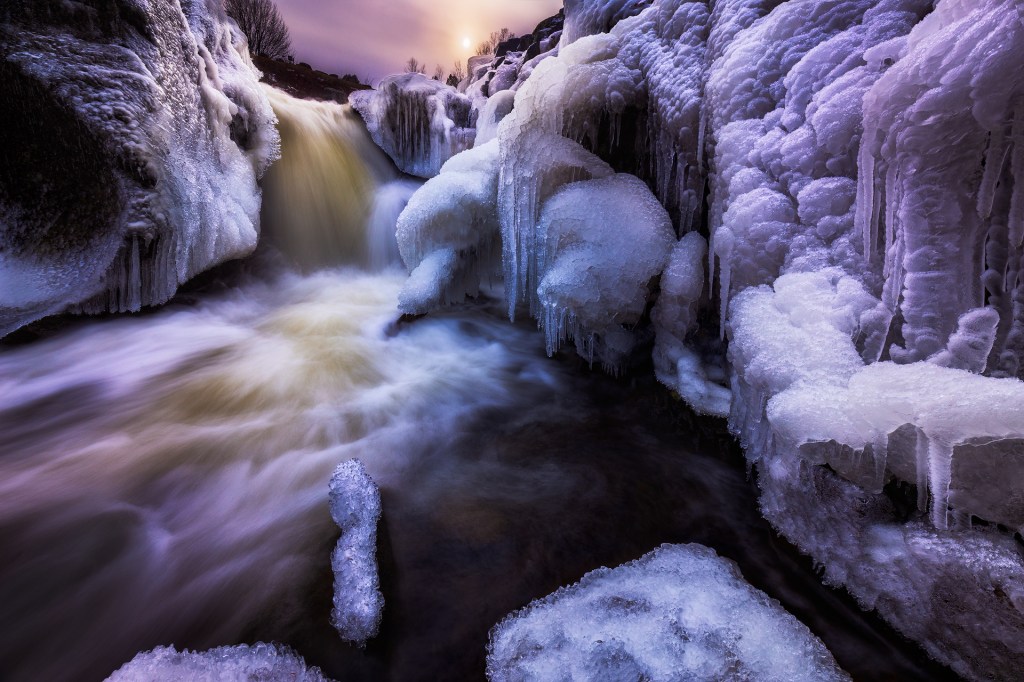
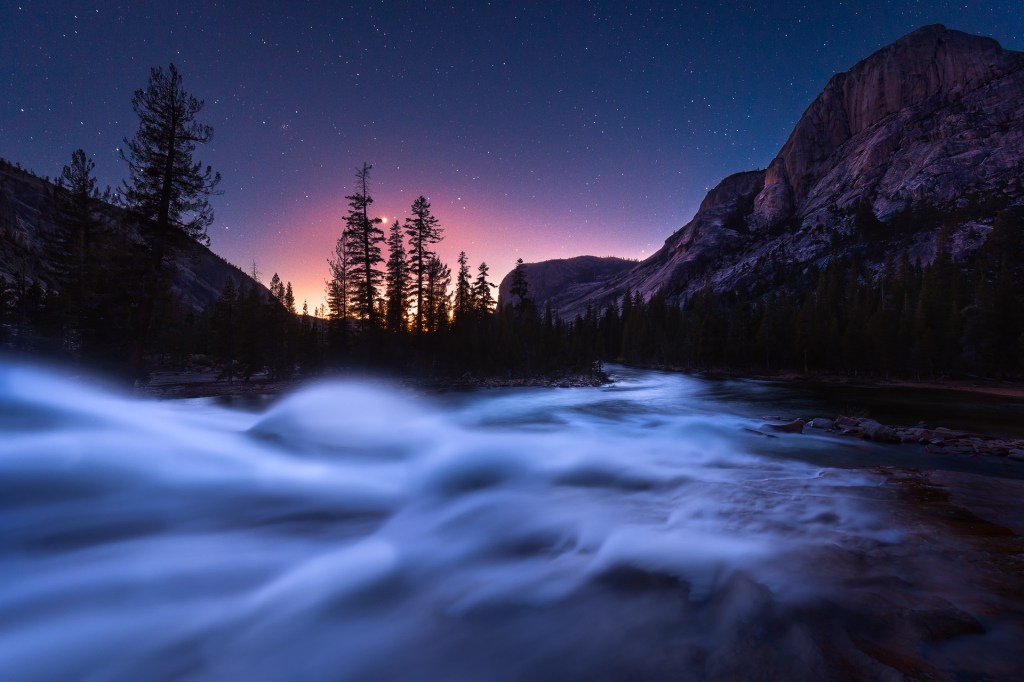
8. Experiment with Different Techniques and Conditions
Like any art form, one of the most fun aspects of photography is experimentation. Shooting under different conditions, different times of day (or even night) and using an unusual perspective are all ways to create unique photographs that will stand out from the crowd. Even though waterfalls are most commonly associated with the lush greenery and warm days of spring and summer, winter is an overlooked season for waterfall photography, and can often yield otherworldly results. Clear night skies also make for intriguing conditions where photographs can be made of stars twinkling above a cascading waterfall or winding river. These are just a few examples of atypical conditions that can yield exciting results, and I encourage you to get out there, experiment, and have fun!

Excellent tips. I have not used an nd filter for waterfalls so I will have to try that technique sometime. Amazing images!
LikeLike
Thanks, Angela, that’s much appreciated! ND filters can be a lot of fun and offer so many creative possibilities. Happy shooting, and I hope that you’re staying safe and healthy!
LikeLiked by 1 person