
Clouds begin to break en route to the summit of Katahdin, the highest peak in Maine and the northern terminus of the Appalachian Trail.
Clouds begin to break en route to the summit of Katahdin, the highest peak in Maine and the northern terminus of the Appalachian Trail.
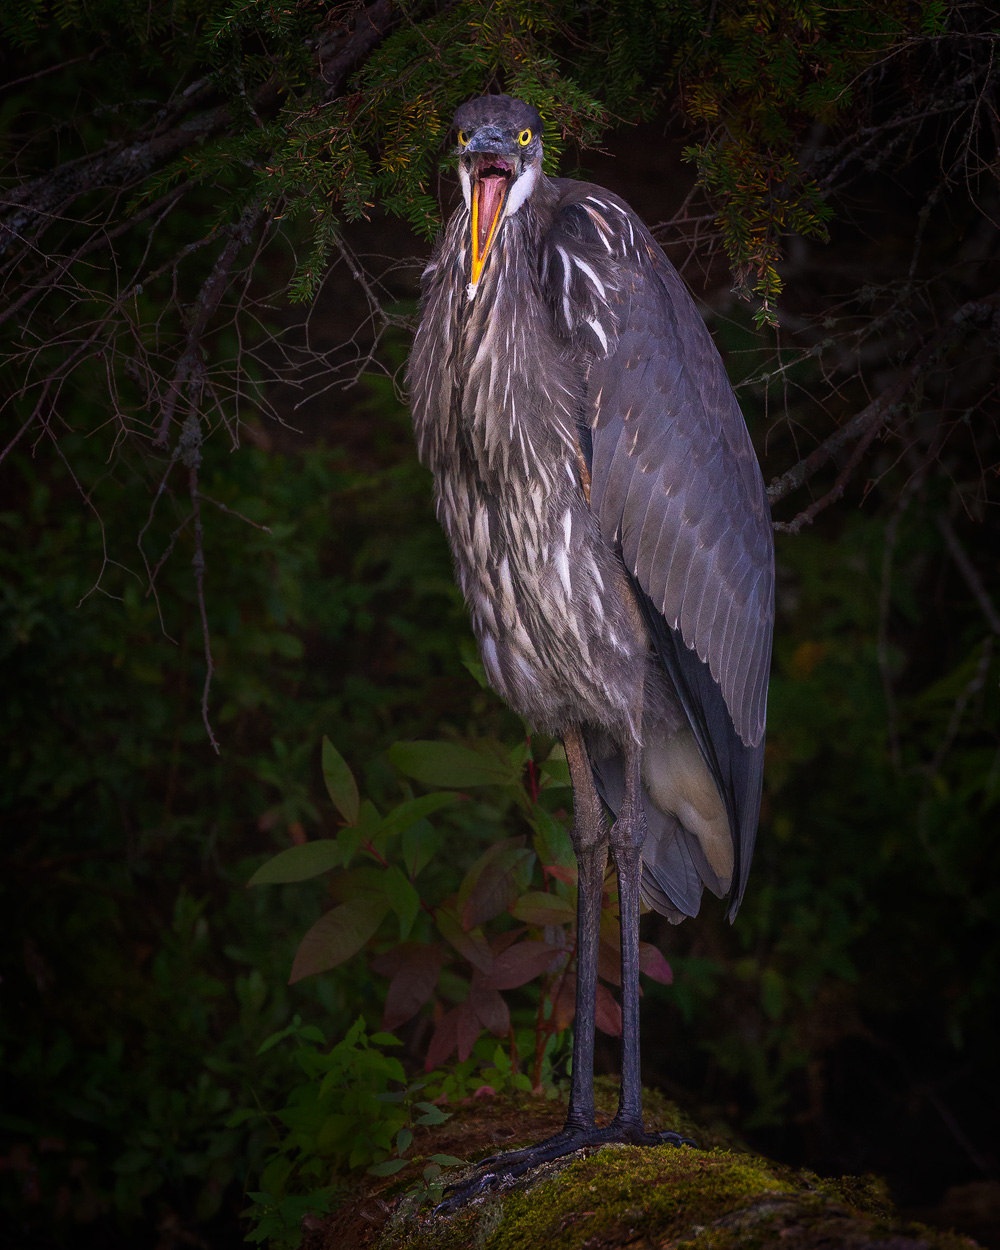
A heron paused from its quest for dinner to say hello as I paddled by on an Adirondack pond. Prints Available.
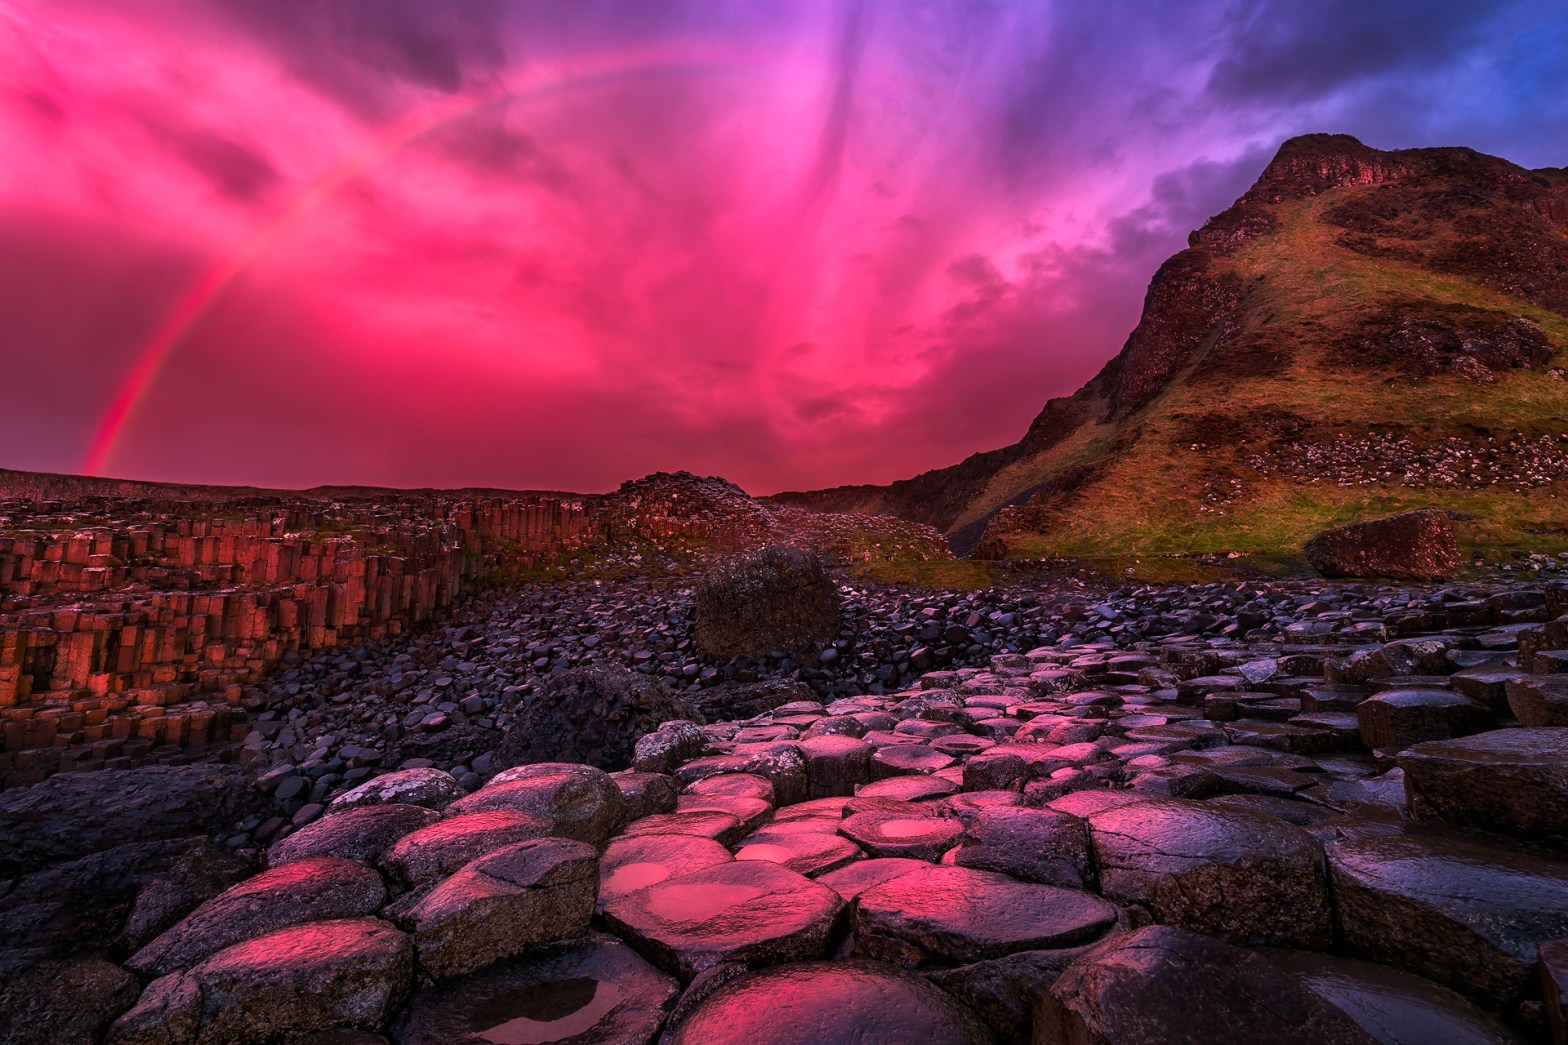
On this unforgettable evening at Giant’s Causeway, I was so enraptured by the phenomenal sunset over the ocean (see my photo entitled “Eruption”) that I almost completely missed this unbelievable scene that was unfolding behind me. It’s not often that conditions such as these coalesce at the perfect moment, and after an exhausting journey across the Atlantic and through most of Ireland to reach here, being able to witness and capture this moment in person felt like the ultimate reward. Giant’s Causeway, Northern Ireland. Prints Available.
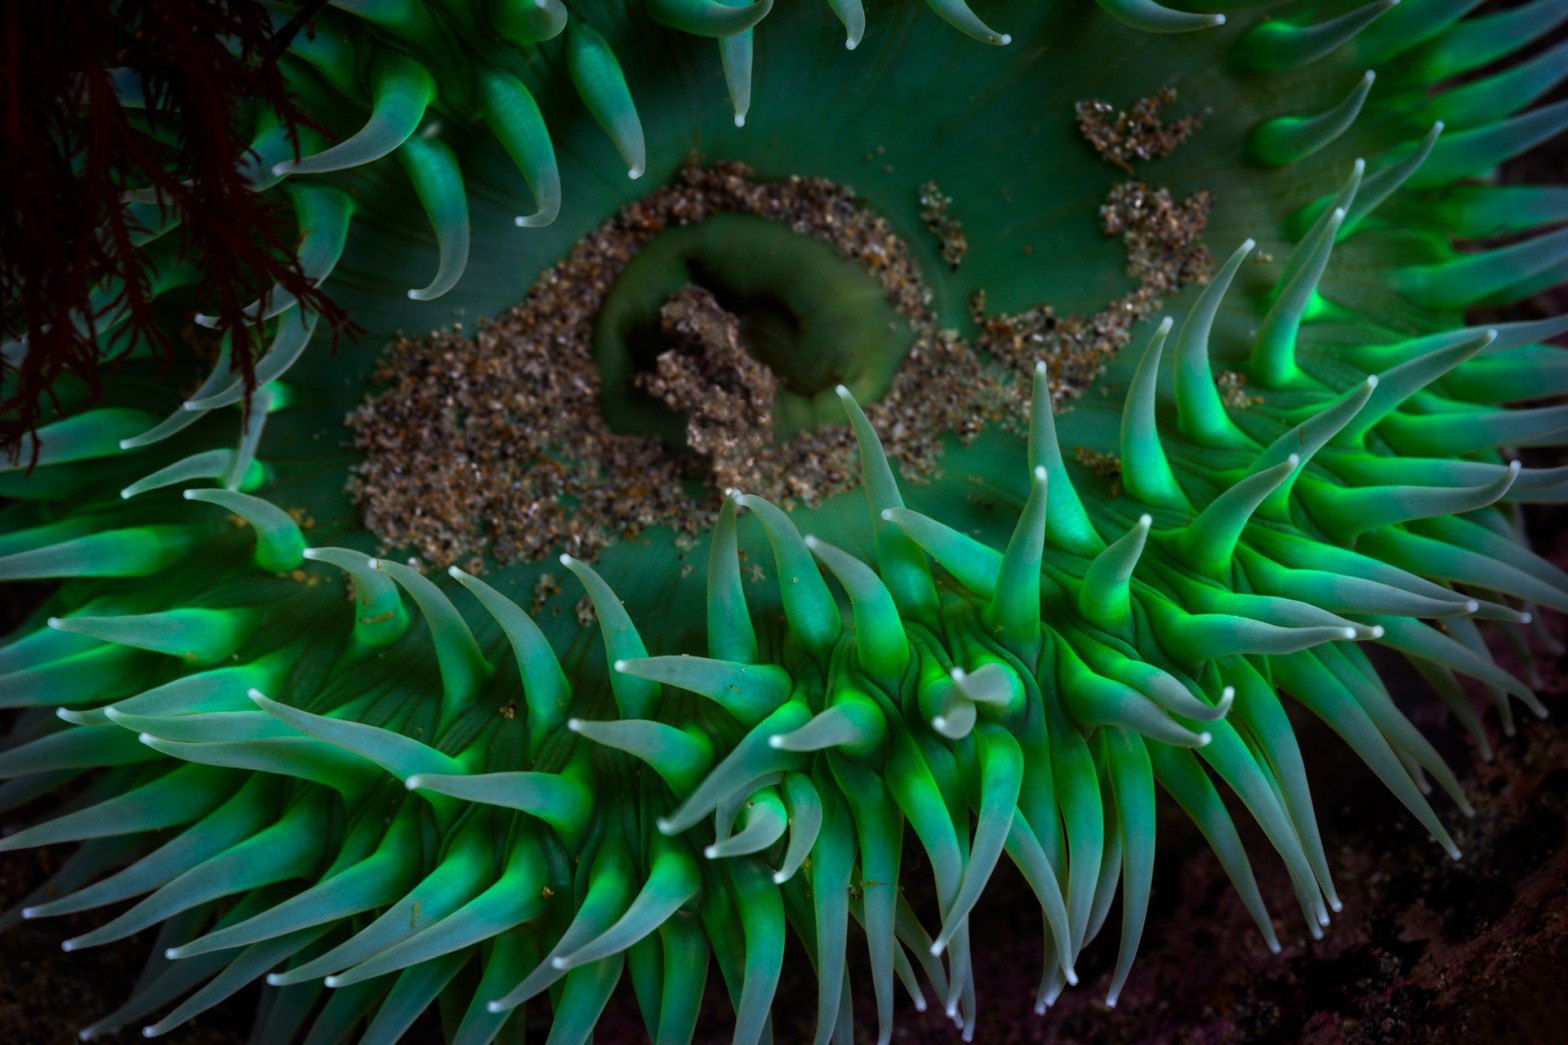
An intimate view of a sea anemone I found in one of the many tide pools at Point of the Arches. The opportunity to view sea life such as sea anemones and starfish in a wilderness setting is one of the many reasons why the coast within Washington’s Olympic National Park is one of my favorite destinations for backpacking and photography. Prints Available.
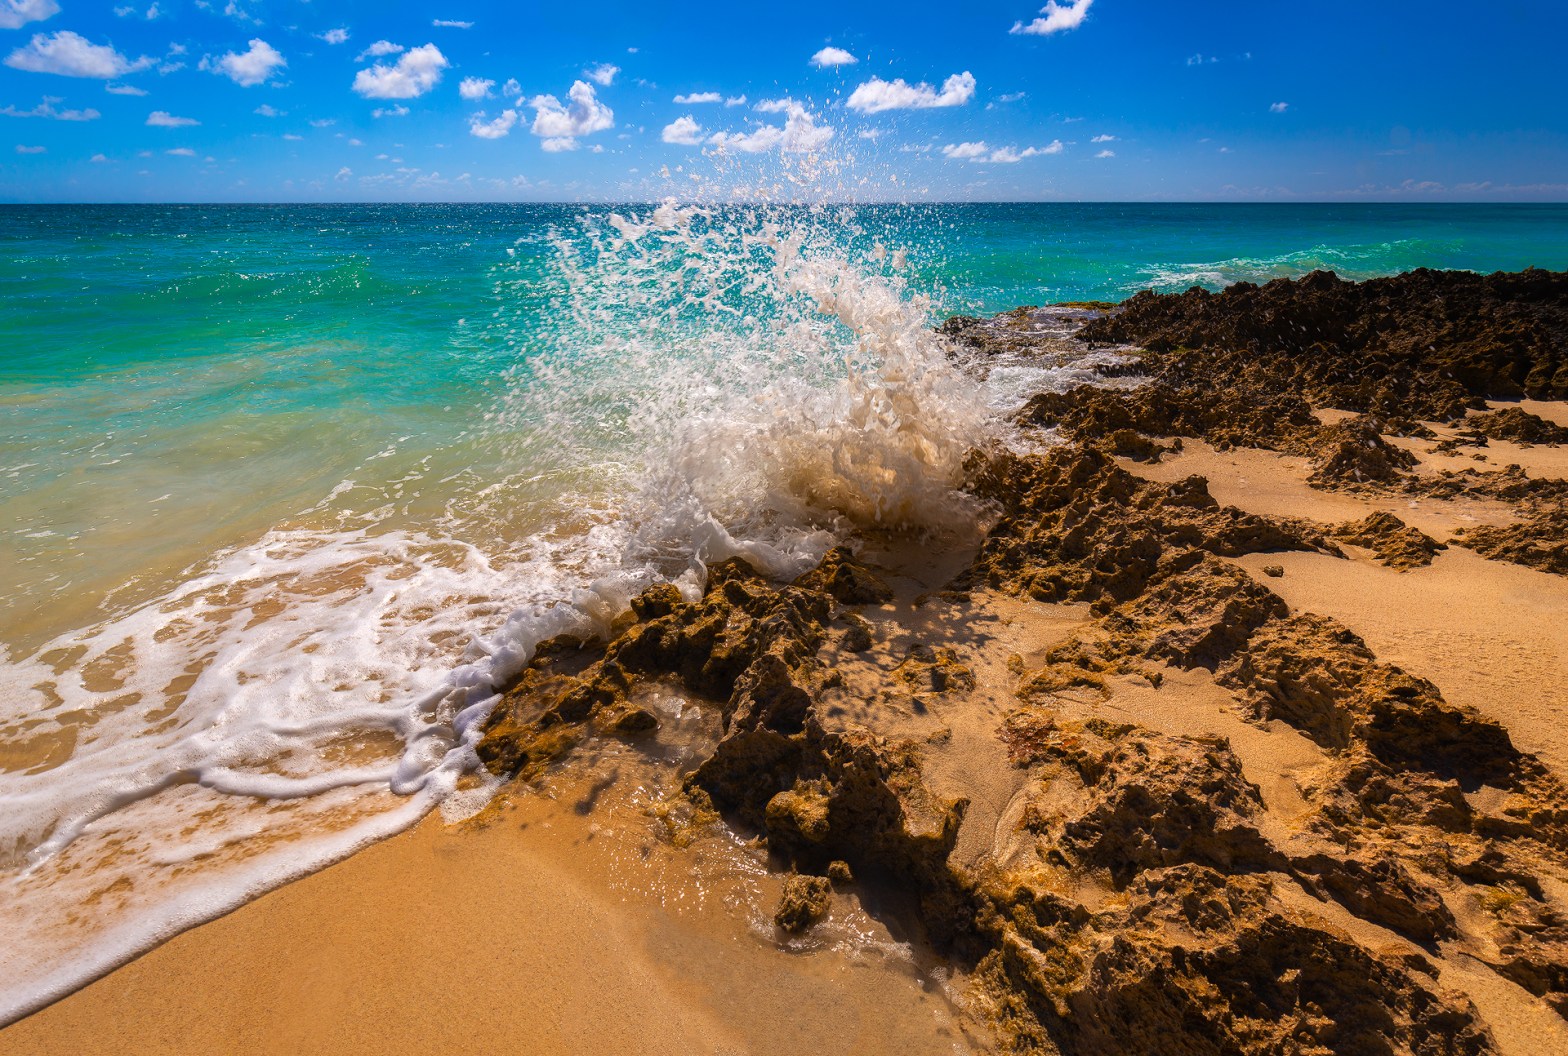
A wave crashes and sprays on the beach where beautiful volcanic rock protrudes above the sand. Saona Island, Dominican Republic. Prints Available.
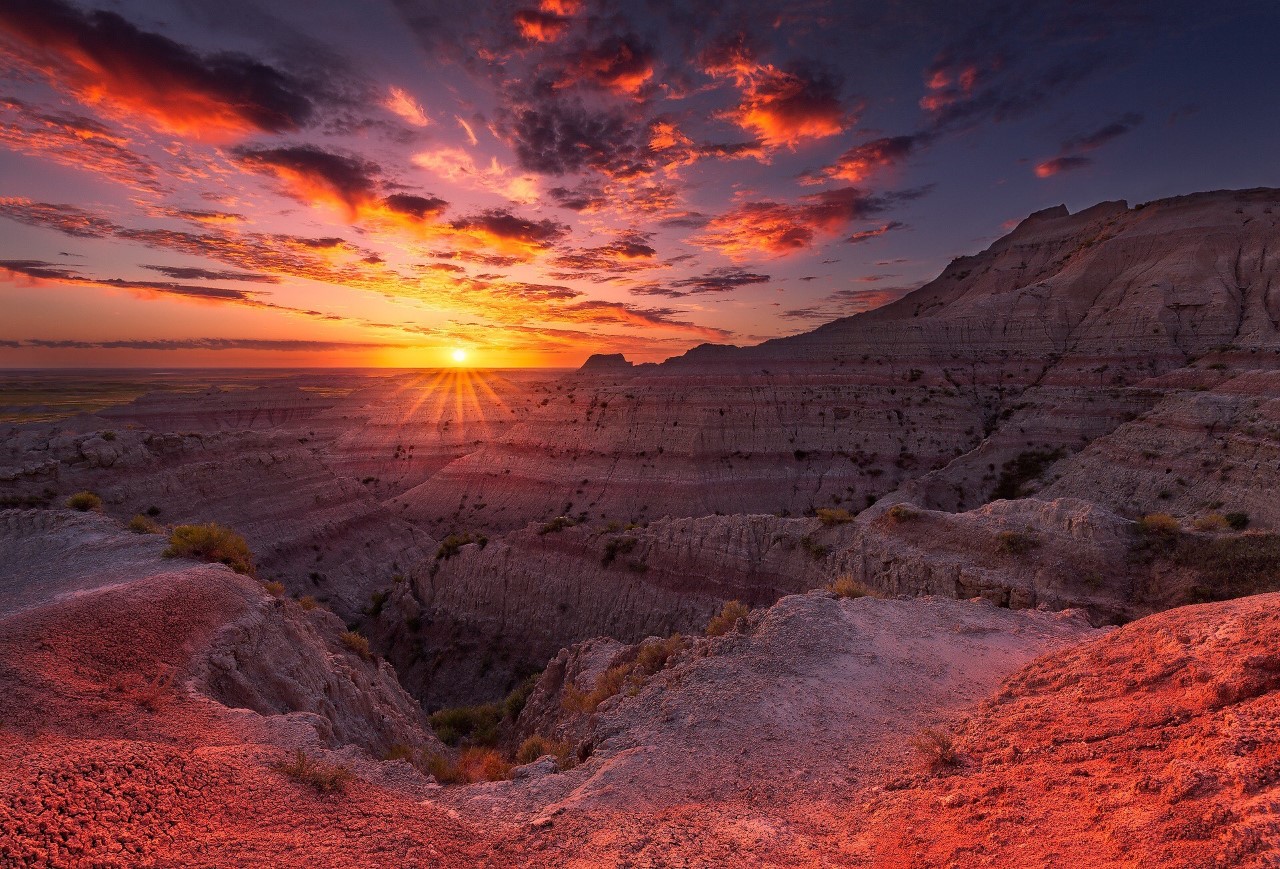
The sun rises over the distant plains, showcasing the surreal and colorful badlands of South Dakota’s Badlands National Park. Prints available.
Note
An article on this photo can be found at Landscape Photography Magazine.
Shooting stars streak across the beautiful night sky, at the height of the Perseid meteor shower in August 2016. The otherworldly bentonite clay formations in the foreground were the perfect complement to the shooting stars and the colorful nebulae of the Milky Way galaxy. I stayed up all night watching hundreds of shooting stars streak across the sky, and this was undoubtedly one of my favorite and most memorable moments (and photographs) of a year-long cross country road trip. Cathedral Gorge State Park, Nevada. Prints available.
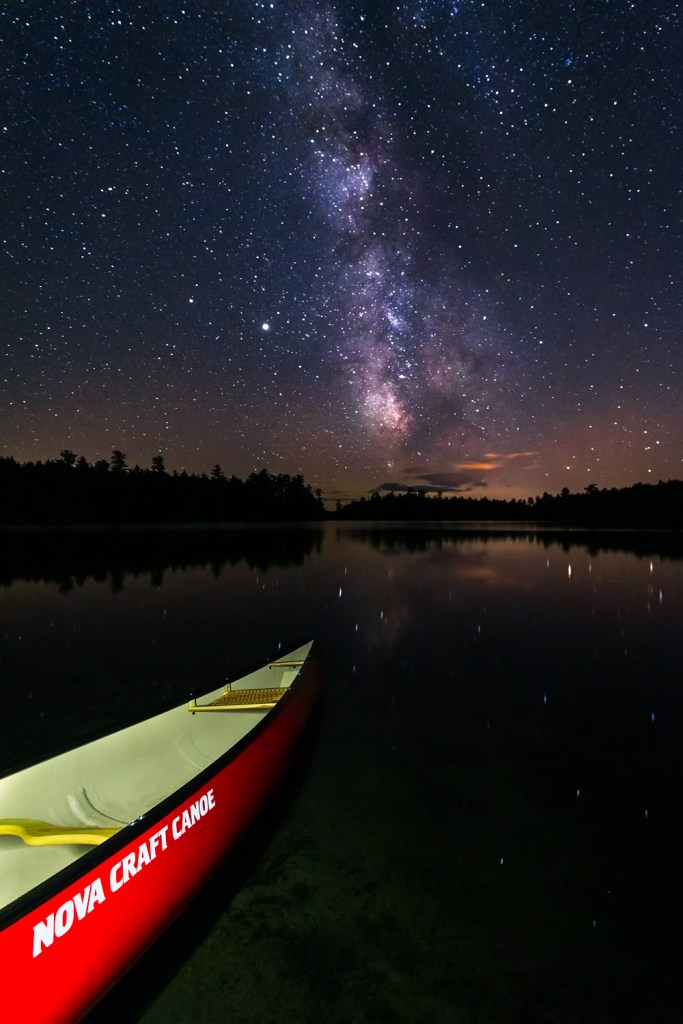
As the days grow longer, the temperature rises, and frozen lakes and ponds return to their liquid state, the serene waters of the Adirondack Mountains beckon the outdoor adventurer to stow away their snowshoes and skis and break out a canoe or kayak for long sunny days of aquatic exploration. Home to over 3,000 lakes and ponds, a paddling destination suited for every taste can be found in the vast Adirondack Park. For a fine introduction to what backcountry canoe camping in the Adirondacks is all about, head to Follensby Clear Pond in the Saranac Lakes Wild Forest. While small enough (roughly 1.5 miles from end to end) to explore in a day, the beautiful waterfront campsites, plentiful wildlife, and options for further exploration make Follensby Clear an ideal basecamp to call home for a few days. Don’t have a canoe or kayak of your own? No problem, just head to St. Regis Canoe Outfitters in Saranac Lake or nearby Floodwood Pond for boat/gear rentals, guidebooks and maps, and trip details from the friendly staff. After launching from the parking area at the south end of Follensby Clear Pond on State Route 30 (where a dock facilitates the loading and unloading of boats), glide through the placid waters as you bid adieu to civilization. Trace the sinuous shoreline, keeping an eye out for herons hunting in the shallows, and scout out the numerous campsites that pepper the shore. Note: the DEC periodically closes campsites and builds new ones in popular locations such as Follensby Clear, so give the regional DEC office a call ahead of time to find out the most up to date status. Contact info and other details and regulations can be found at the Saranac Lakes Wild Forest DEC website.
While the closest campsites are a mere stone’s throw from the parking lot, press on to the quieter northern half of the lake to avoid most of the day-tripper traffic and to discover primo island campsites (including one of the only lean-tos in the area) as well as a large and beautiful campsite on a peninsula that extends from the western shore in the north end of the pond. All campsites are first come, first served and have an outhouse or open-air “thunderbox” as well as a fire ring, but no picnic table or food storage lockers. While bear canisters aren’t necessarily required in the Saranac Lakes Wild Forest, they’re highly recommended to avoid having pesky rodents and raccoons getting into your food bag, even if it has been expertly hung.
Once camp is established, spend your days either lounging around camp or heading out to some of the enticing destinations that make for perfect daytrips from camp. For a half-day loop that visits three additional ponds and has very short portages, find the portage trail on the west side of Follensby Clear, located about midway up the pond and just southwest of the island that has the lean-to campsite. Take the short portage trail down to the landing at the eastern corner of lovely Horseshoe Pond and explore the interesting peninsula (complete with a killer campsite) that can be seen across the pond from the landing. After enjoying the solitude of Horseshoe Pond, paddle to the northwest corner of the pond to make the short portage to small and boggy Little Polliwog Pond. The portage trail intersects with the Horseshoe Pond Trail, which makes for a nice leg stretcher and heads north to Polliwog Pond or south back to Horseshoe Pond. Once on Little Polliwog Pond, paddle northeast to the downhill portage trail to much larger Polliwog Pond and take your time exploring Polliwog as you work your way to the northeast corner of the pond and the short portage trail back to Follensby Clear Pond.
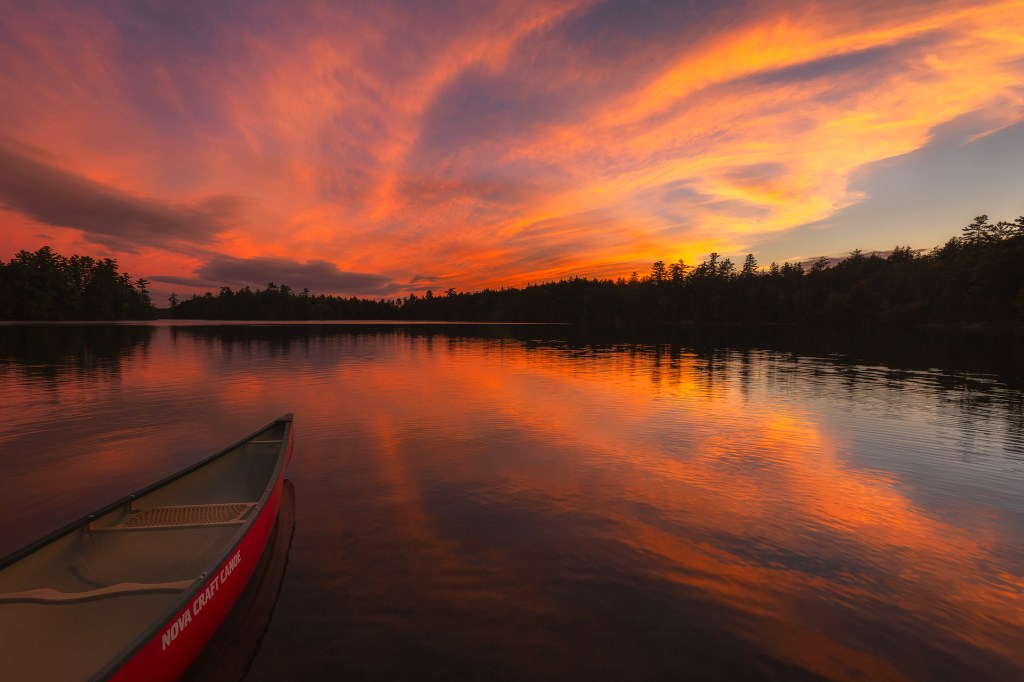
Whether the day has been spent paddling to distant waters or relaxing at camp, there’s no finer way to end a wonderful day on the water than by taking a dip and laying out in the sun to dry. As night approaches, light up a campfire and listen to it crackle as the haunting call of loons echoes across the lake, quite possibly the most Adirondack way to cap off an exhilarating day of paddling in the vast Adirondack wilderness.
Note
A version of this article can be found at EMS Go East Blog.
A Scottish Highland calf seeks the shelter of its mother in a meadow at June Farms in Upstate New York. Prints available.
To truly appreciate the colors and details of a stunning photograph, nothing compares to a fine art print. Prints not only provide a means to display a photograph at a much larger scale, they also allow for the photograph to be printed in an expanded color space beyond the sRGB of the Web. The result is a piece of art that fully captures the details, colors, and beauty of the scene as I experienced it.
Aluminum Prints
My personal favorite method of photo printing and display is to print my photographs on aluminum through a process known as dye-sublimation. The result is a print of unrivaled clarity, color, and beauty.
Hanging Options & Finish
All of my aluminum prints come ready-to-hang with a float mount (details below). All prints come with a semi-gloss finish that accentuates the colors and details of the print, while also minimizing glare.

Float Mount
Float mounts set the print 1” off the wall, giving the print the appearance of “floating” off the wall. This striking and modern look eliminates the need for a frame, matting, and glass, reducing cost and glare.
Finishing Touches
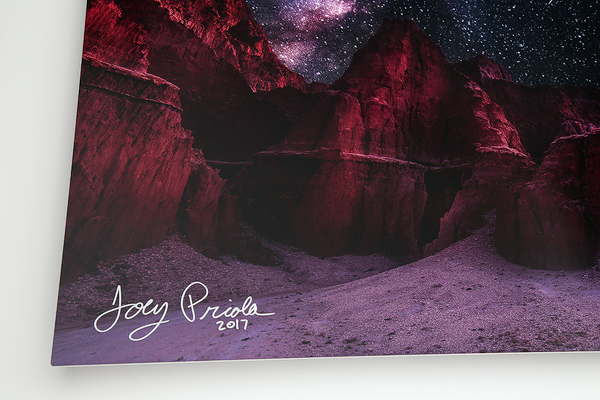
All prints are hand-signed, and include the year in which they were printed. While prints are typically signed in the bottom-right corner, occasionally the bottom-left will be signed if it fits the composition better. I also include a handwritten note with each print about the moment captured in the photograph, what it means to me, and what I hope it will mean to you.
Paper Prints
Traditional paper prints are an excellent and affordable way to enjoy my photography in your home or office. Prints are made on high-quality Kodak Lustre paper, which showcases the colors and contrast of the image and has a slight, almost pearl-like texture that provides added depth. This paper also has the benefit of possessing minimal glare, so that the print can be enjoyed in uneven lighting when framed.

Custom Orders
Looking to purchase a print in a different style than paper or aluminum? Please reach out to me via the “contact” header on this website and I’d be happy to work with you to meet your needs.
How to Order
To purchase a print, simply click “Buy” below the image title and caption, and you’ll be able to select the size and framing option of your choice. If you are viewing the image on a mobile device or in full screen mode, just click the << symbol in the upper-right of the webpage to reveal the “Buy” option. For any questions regarding prints, please send me a message by clicking on the “contact” tab at the top of this page, and I will get back to you shortly. Prints are typically delivered within 2-3 weeks of ordering.